Table of Contents
When PACKMAN is integrated with Healthlinks Dispensing, patient medication profiles can be quickly created from the patient’s dispensing history.
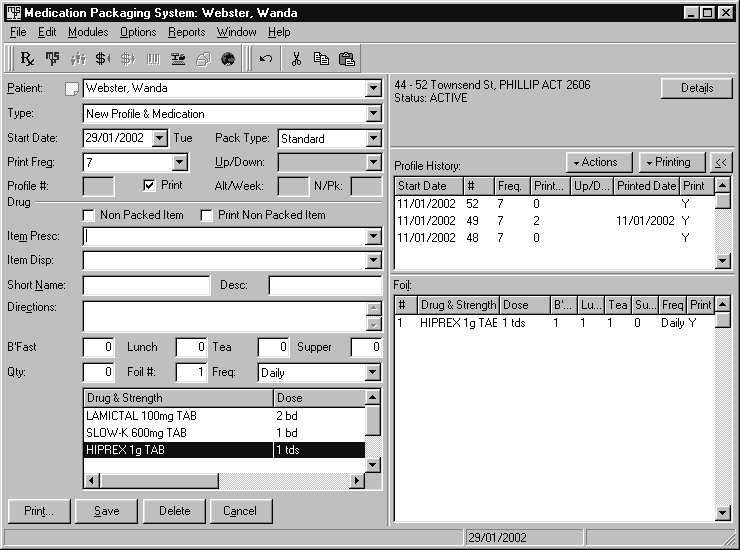
Use the transaction panel in the PACKMAN work area to create your patient’s medication profiles. The table below lists the information required to create a profile.
Information #
- Patient
- Type
- Start Date
- Pack Type
- Print Frequency
- Up/Down
- Non Packed Item
- Print Non Packed Item
- Item Prescribed
- Dosage Times
- Quantity
- Foil Number
- Frequency
- Drug and Strength Box
Patient #
In the Patient box, you can select a patient by typing the patient’s:
- Name
- Code
- Details (i.e. address, entitlement number, etc.).
Patient’s Name #
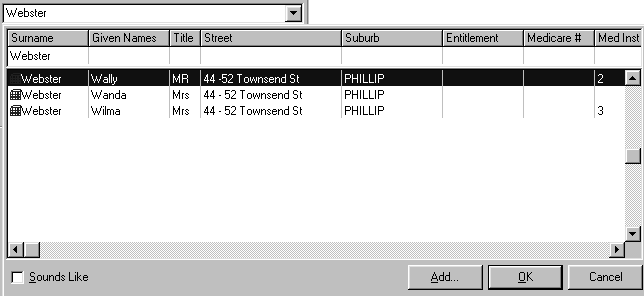
To select a patient using their name:
- In the Patient box, type part of the patient’s surname.
- Press Enter.
The patient list will drop down with the closest match highlighted - Select the name you want, then choose OK.
The patient’s details are displayed in the reference panel.

To speed up the patient list, in Step 1 above type part of the patient’s surname, then a comma, then part of the patient’s given name (e.g. their first initial)
If you are unsure of the spelling, type the name as it sounds and select the Sounds Like check box on the Patient drop-down list.
Patient’s Code #
Each patient has a unique identifying code generated by the Amfac modules. You can change this code in the Patient Details screen. See page 126 for more details.
To select a patient using the code:
- In the Patient box, type a full stop followed by the code.
- Press Enter.
The patient’s details are displayed in the reference panel.
Patient’s Details #
You can find patients by any of the details shown in the patient drop-down list, including address and entitlement number.
You don’t need to include patient name information to be able to search by other details (e.g. you can search by entitlement number alone).
To select a patient using their details:
- From the Patient box, drop down the patient list by pressing Alt+Down Arrow or by clicking on the
 with the mouse.
 - Type the details to search for into the appropriate columns.The patient list will be updated with the closest match highlighted.
- Select the patient you want, then choose OK.
The patient’s details are displayed in the reference panel.
Use wildcards to search for text that is in the middle of data, for example to search by street name ignoring street number.
Inactive Patients #
Profiles for inactive patients are not printed during batch runs (although they can be printed manually from the PACKMAN work area.
If you attempt to select an inactive patient, a warning is displayed:
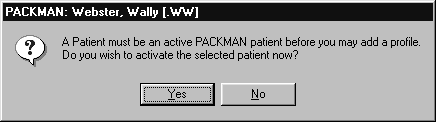
To activate the patient:
- Choose Yes to activate them.
The Patient Identity screen is displayed - Choose OK to make the patient active indefinitely.
Alternatively, select the Inactive From box and enter a new date for the patient to become inactive.
Patients can also be deactivated from the patient organiser so that they cannot be accessed from the PACKMAN work area but are retained in the system for reporting.
Type #
Use the Type box to select whether you want to:
- Start a New Profile and Medication
- Add a Medication to a Profile
- Edit a Profile and Medication.

Start a New Profile
To create a new profile:
- Select New Profile & Medication from the Type box.
Add a Medication
To add a medication to an existing profile:
- Select Add Medication to Profile from the Type box.
Edit a Profile
To edit an existing profile:
- Select Edit Profile & Medication from the Type box.
Start Date #
Use the Start Date box to enter the date the profile is to start by either:
- Typing the date into the Start Date box.
- Selecting the down arrow, then selecting the date from the calendar.
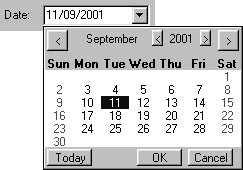
The start date defaults to the current date.
Pack Type #
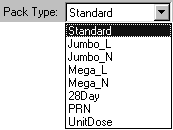
Use the Pack Type box to select the type of pack to be used for the profile.
The pack types available in PACKMAN are:
- Standard
- Jumbo_L
- Jumbo_N
- Mega_L
- Mega_N
- 28 Day
- PRN
- Unit Dose.
The pack type automatically defaults to the option set in the Medical Institution details or Module Setup.
A separate profile must be created for each different pack type. For example, if a patient is using both a Jumbo_L and a 28 Day pack, separate profiles must be created for each.
Print Frequency #
Use the Print Frequency box to select how often foils are to be printed for the patient. Foils can be printed every 7, 14 or 28 days.

The Print Frequency automatically defaults to the option set in the Medical Institution details or Module Setup.
Up/Down #
Use the Up/Down box to select the direction the foil is to be printed.
The direction automatically defaults to the option set in the Medical Institution details or Module Setup.
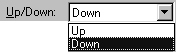
The direction setting only applies to Jumbo, Mega and 28 Day packs.
Print #
The Print box automatically defaults to selected (i.e. the profile will be printed as part of the next batch run if it is due).
If you do not wish to print the profile (e.g. to temporarily disable this profile), choose the Print box to deselect it.
The profile will remain inactive until you edit it and select the Print box again.
Non Packed Item #
Use the Non Packed Item box to flag a medication as non-packed (i.e. medications such as creams, mixtures and inhalers that are not packed in the foil bubbles).
Non-packed medications are displayed in blue text on the Foil list in the Reference Panel.
Non-packed items will only be printed on labels and signing sheets if the Print Non Packed Items box is selecte
Print Non Packed Item #
When the Print Non Packed Item box is selected the medication is printed on the labels and signing/prn administration sheets.
This option is automatically selected when the Non Packed Item box is selected.
Item Prescribed #
Items can be added to the patient medication profile by selecting the item:
- Manually
- From the patient dispensing history.
To add an item from the patient’s dispensing history to their PACKMAN medication profile:
- Locate the required item in the patient history list.
- Double-click on it to transfer the details to the transaction panel.The item’s short name, description, directions are automatically entered from the prescription details.
- Complete the remaining details.
- Print or Save the profile.
Dosage Times #
Use the Dosage Time boxes to enter the quantity of the medication to be taken at each dosage time.
![]()
For example:
Quantity #
The Quantity field displays the quantity of the medication required to make up the packs for the print frequency.
PACKMAN automatically calculates the quantity from the directions and the print frequency.
Foil Number #
The foil number automatically defaults to 1. Where the number of medications on the profile exceeds 8, the software automatically allocates additional medications to foil 2.
The foil number can be adjusted manually to allow for larger tablets.
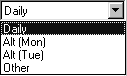
Frequency #
Use the Frequency box to select how often the medication is to be given:
- Daily
- Alternate days starting Monday
- Alternate days starting Tuesday
- Other days of the week.
The default frequency is daily.
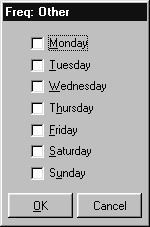
If you select the frequency as Other:
- Select the days of the week the medication is to be given from the drop-down list then.
- Choose OK to return to the work area.
Drug and Strength Box #
Once the dosage times are complete, press Tab until the medication is displayed in the Drug & Strength box at the bottom of the transaction panel.
Adding Additional Drugs #
Once the drug entered is displayed in the Drug & Strength box in the transaction panel, the cursor is returned to the Item Prescbox for you to select further drugs.
Repeat the same steps to add additional drugs to the profile.
Printing and Saving the Profile #
Once all the drugs have been entered for the new profile, a foil can be printed immediately (and the profile saved automatically) or saved (and printed at a later stage).
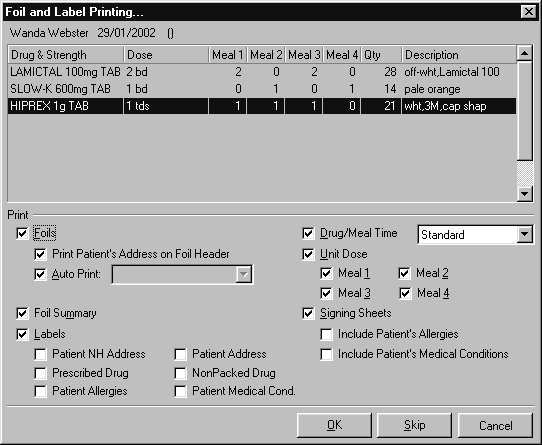
To print the profile:
- Select the Print button in the bottom corner of the transaction panel
- Select the required options in the Print panel and choose OK to start printing.
.
The profile is saved during printing.
To save a profile without printing:
- Choose Save.
You can set up automatic print defaults in Module Setup.


