- From the Sales screen, select the ‘New Sale’ button (see Figure 1.14.8).
- From the ‘LOTS New Sale’ screen, enter the item(s) that you wish to place on Lay-By.
- Select the Lay-By button or Ctrl+L via Sale in the title bar at the top of the screen (see Figure 1.14.9).
- Selecting Lay-By will bring up the ‘Lay-By’ window (see Figure 1.14.10
- You will need to firstly select a customer to assign the Lay-By to.
- The ‘Start Date’ of the Lay-By will be automatically set to the current day. The ‘Finish Date’ will default to the Lay-By period previously setup in Lay-By options (Refer to Tools Options Lay-By tab Default Lay-By period). The ‘Finish Date’ can be changed to any future date if required (see Figure 1.14.11).
Note: Double clicking the date field or pressing the [Insert] key will access a calendar function, allowing you to select the date.Also, the ‘Finish Date’ cannot be blank - To take a deposit select ‘Enter Deposit (+)’ (see Figure 1.14.12), which will display the ‘Enter Lay-By Payment’ window (see Figure 1.14.12).
Note: When a deposit is taken the Lay-By number is not assigned until the Lay-By is finalised (see Figure 1.14.12). - In the ‘Total Payable’ field enter the deposit amount, select the tender type and select ‘OK’.
- To view all of the payments made on a Lay-By, select the ‘Payment History’ radio option. This will show all payments made over the life of the Lay-By (see Figure 1.14.13).
- The other option ‘Payment Schedule’ shows how much and how often a payment is expected to be made (see Figure 1.14.13).
Note: If a payment is made sooner than expected or the payment is more/less than the expected amount, the ‘Payment Schedule’ will recalculate. - Select ‘OK’ to proceed (as shown in Figure 1.14.14).
- Once the docket is printed out the customer will be required to sign the docket to confirm the Lay-By.
Note: When creating a Lay-By for multiple items you will be prompted with a message asking if you wish to ‘Combine all stock Items on one docket?’ (See Figure 1.14.15). If you select No, a separate docket will print out for each Lay-By item.
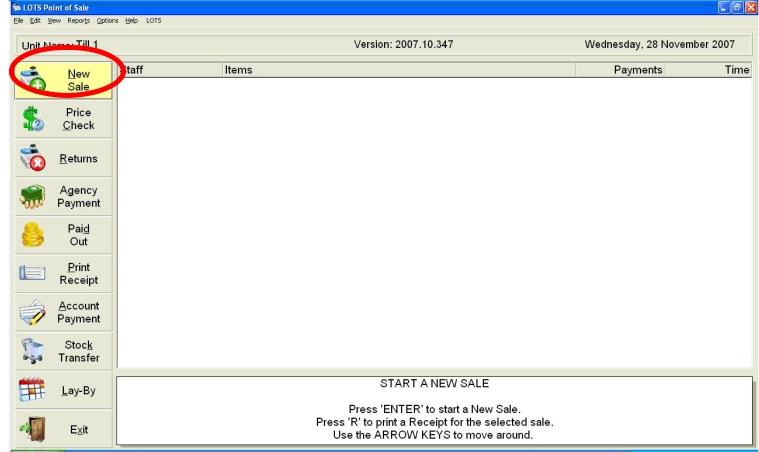
Figure 1.14.8
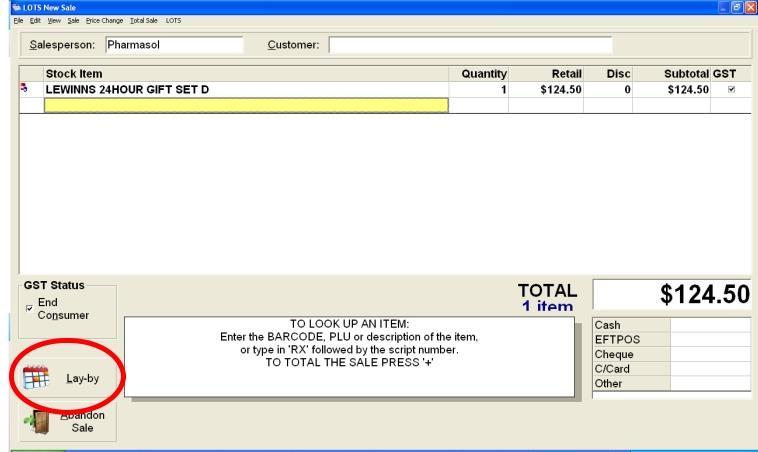
Figure 1.14.9
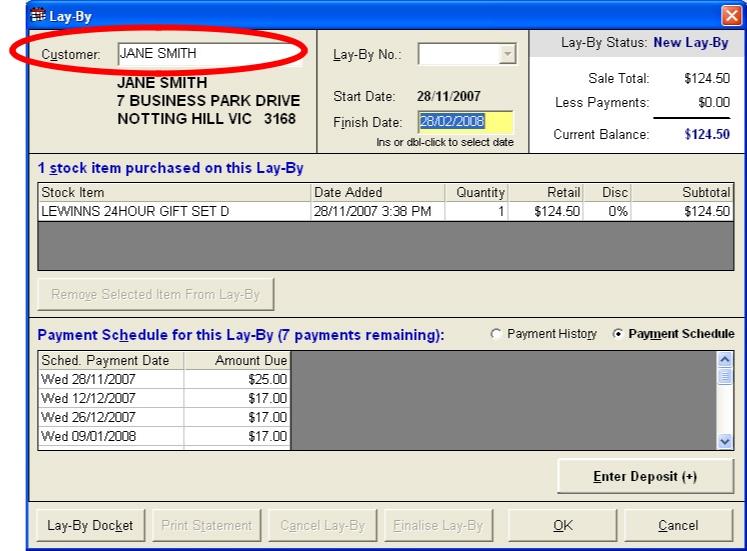
Figure 1.14.10
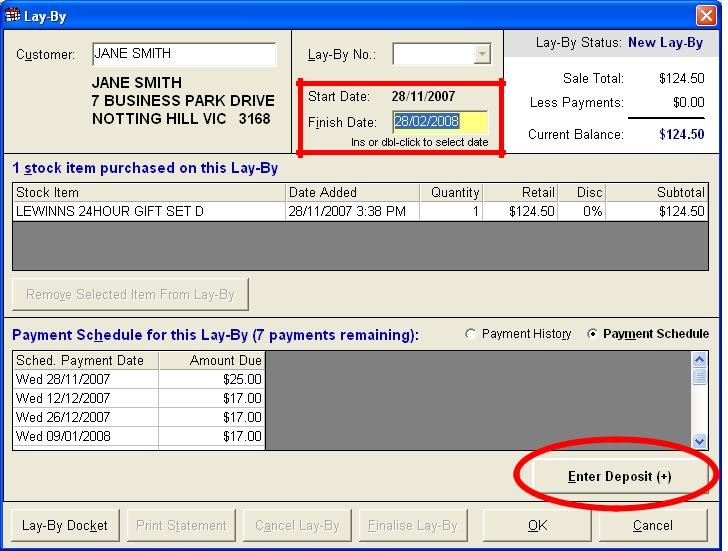
Figure 1.14.11
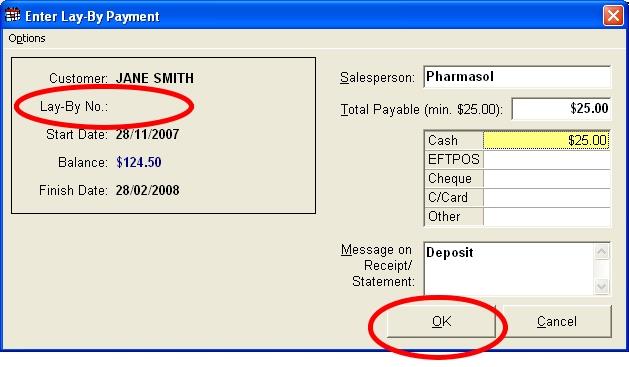
Figure 1.14.12
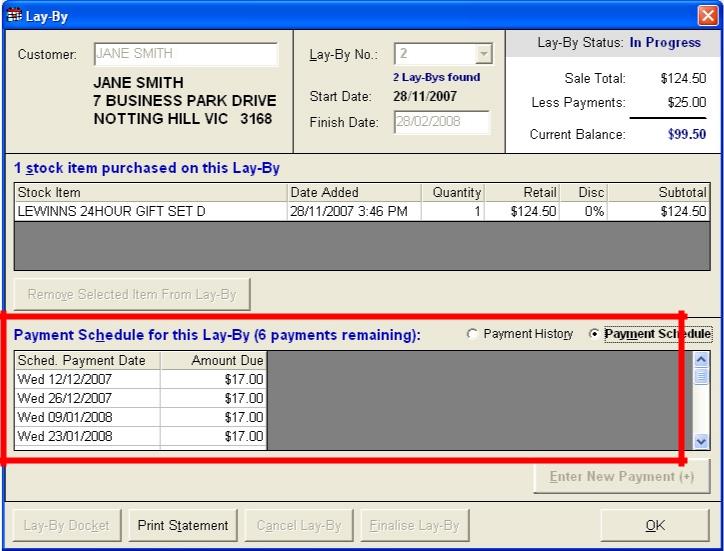
Figure 1.14.13
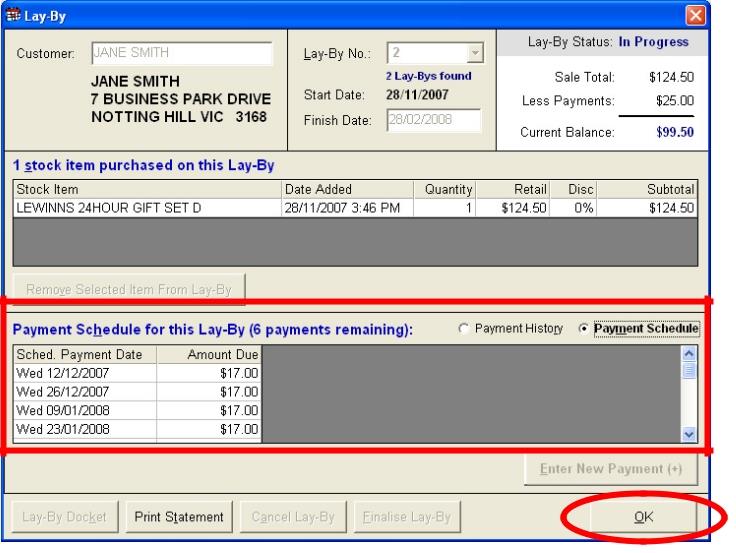
Figure 1.14.14

Figure 1.14.15


