- From the LOTS Main MenuTools Options (see Figure 1.14.1).
- Enter in your staff ID (if required) to proceed
- From the Options screen, select the Lay-By tab (see Figure 1.14.2).
- When the Lay-By options are displayed tick the ‘Enable Lay-Bys’ tick box (see Figure 1.14.2).
- Once ‘Enable Lay-Bys’ is ticked all other options will become active.
- If you wish to have Lay-By stock dockets printed for items that have been set aside for a Lay-By, ensure the ‘Print Lay-By stock dockets’ tick box is ticked (this option is selected by default).
- To set a Lay-By period simply enter the number of months you would like the Lay-By period to be in the ‘Default Lay-By period’ field. The default for this option is 3 months but it is easily changeable.
- If you wish you can set a ‘Minimum deposit’ (percentage) for the Lay-By. The default minimum deposit is set to 20% of the items total sale price (see Figure 1.14.3).
Note: This will display the minimum payment amount in the Lay-By screen - The option ‘Round payments up to nearest’ can be set as required for the Lay-By payments. The default for this option is $1.00, (see Figure 1.14.4). If you do not wish to round a payment amount you may leave this field blank.
- To set a minimum payment for all Lay-Bys, enter a dollar amount into the ‘Minimum payment’ field. The default for this option is $0.00 (see Figure 1.14.4).
- You will need to set a ‘Payment frequency’. There are three options (see Figure 1.14.5)
- Weekly,
- Fortnightly,
- Monthly.
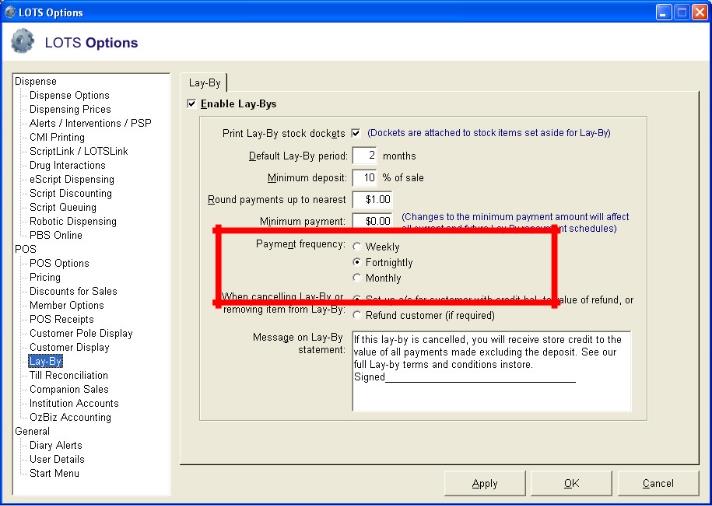
Figure 1.14.5
Select the payment frequency you desire. The default for this option is ‘Fortnightly’. A ‘Payment Schedule’ will be calculated based on this option. - The final option to set in the Lay-By Tab is ‘When cancelling Lay-By or removing items from Lay-By’ (see Figure 1.14.6). You have one of two options to set:
- You can credit the Lay-By customer by placing the value of the payments made onto a debtor account; or
- You can choose to refund the value of a Lay-By (minus the cancellation fee) to the customer. This is the default option.
Note: The cancellation fee is by default equal to the deposit, however, this can be changed at the time the refund is to be given.
- If required you may set a message to appear on the Lay-By statement. This is generally the store’s Terms and Conditions for the Lay-By (see Figure 1.14.7).
- Once all the options are set, select OK (see Figure 1.14.7).
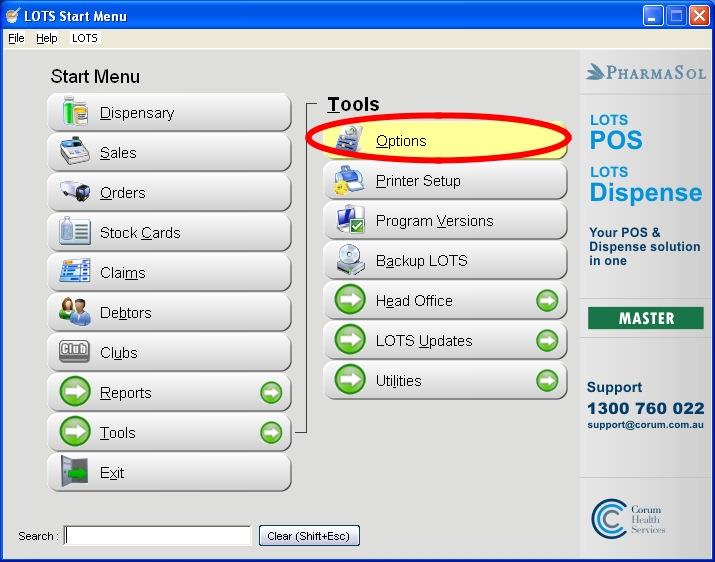
Figure 1.14.1
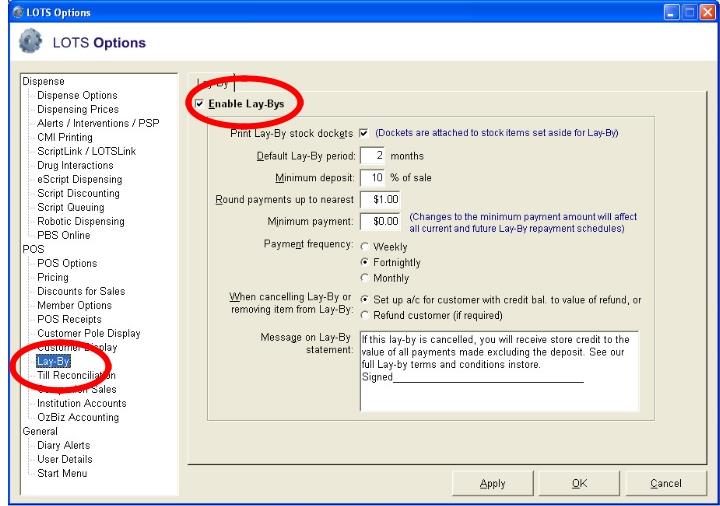
Figure 1.14.2
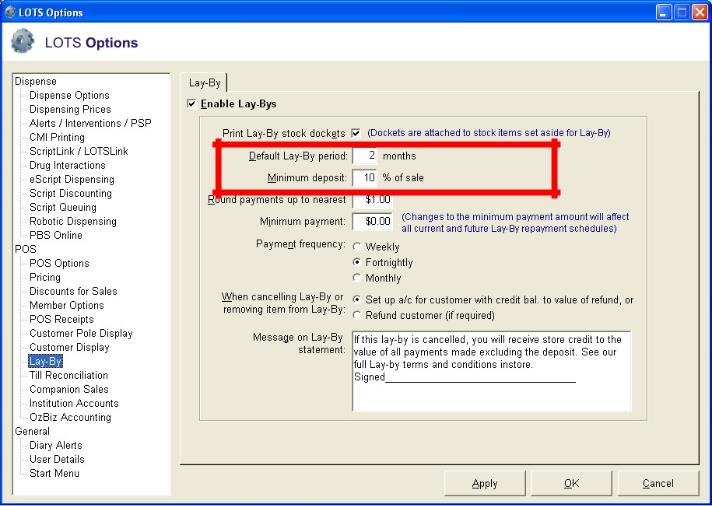
Figure 1.14.3
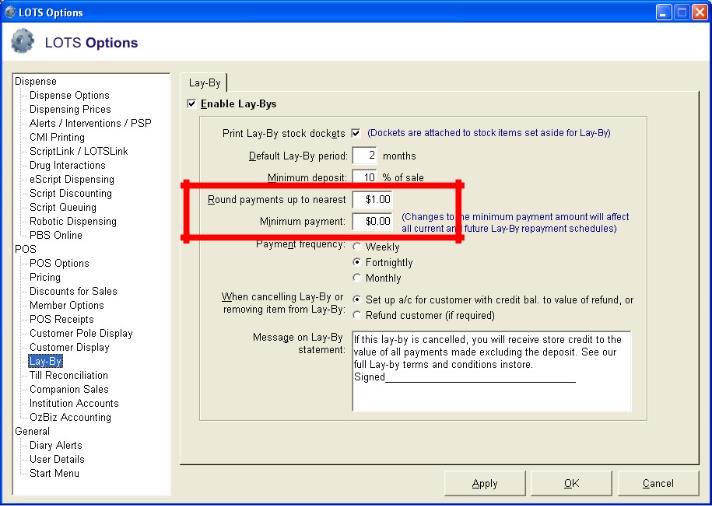
Figure 1.14.4
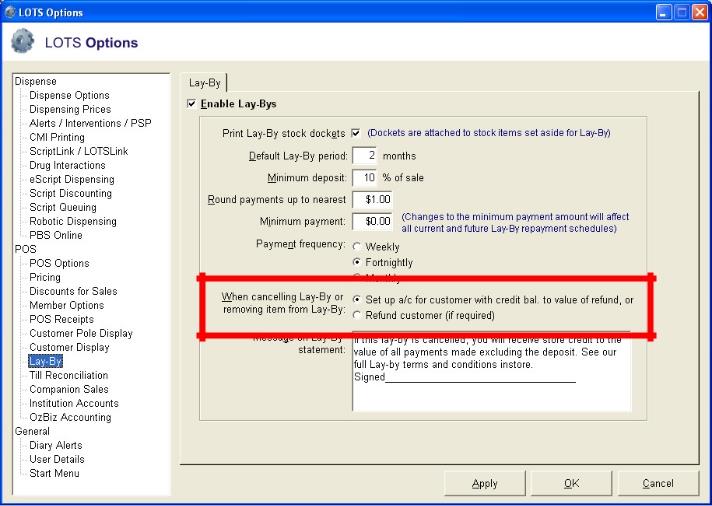
Figure 1.14.6
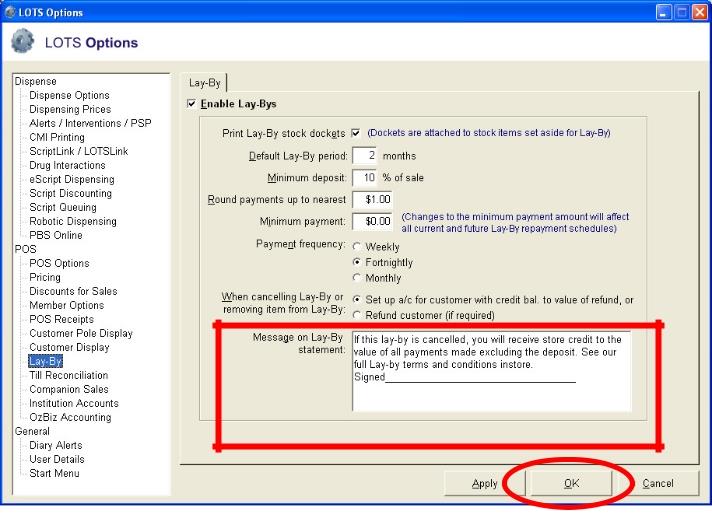
Figure 1.14.7
Note: These options can be set or changed at any time via the Tools Options Lay-Byab.


