Table of Contents
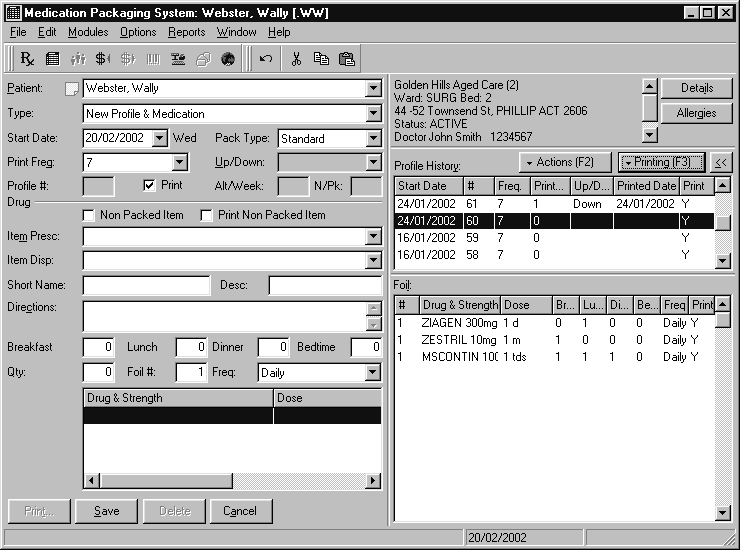
In PACKMAN, you use the work area to create, edit and print patient medication profiles.
To open the PACKMAN work area:
- Select the Start button.
- Choose PACKMAN.
Parts of the Work Area #
The table below lists the parts of the work area:
- Title bar
- Menu bar
- Toolbar
- Status bar
- Splitter bar
- Transaction panel
- Reference panel
Title Bar #
The title bar is te horizontal bar at the top of the window. It has:
- An icon that represents the work area
- The title of the work area
- The name of the person or transaction you are working on
- Minimise, maximise and close buttons.
![]()
Minimising Work Areas
To minimise a work area, select the minimise button on the title bar. If you’re using the keyboard, type Alt + Spacebar + n. When a work area is minimised, a smaller version of the title bar is displayed on the Windows task bar.
In the minimised state, the following information is displayed.
- Program icon.
- The name of the person or transaction you are working on.
![]()
Restoring a Minimised Work Area
Using the mouse, choose the name on the Windows task bar.
Using the keyboard, hold Alt and repeatedly press Tab to browse a list of available windows. Release Alt when the window you want is selected.
Maximising Work Areas
To maximise a work area that takes up a small area of the screen, choose the maximise button on the title bar (see the image above). If you’re using the keyboard, type Alt + Spacebar + x.
When a work area is maximised, it occupies the entire screen.
To restore a maximised work area to its original size and position, choose the maximise button again.
Menu Bar #
Each word on the menu bar represents a menu. Each menu contains a list of commands.
To choose a command from a menu, first select the menu name, then choose the command.
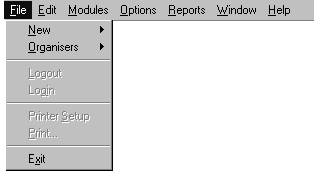
You can access the menu commands using either the keyboard or the mouse.
Using the Mouse #
To access a menu command using the mouse:
- Point
 to the menu and click.
 - Point to the menu and click.
For example:
To exit the work area using the mouse, click on the File menu, then click Exit.
You may come across the following terms when using mouse specific procedures:
- Click
- Double-click
- Right-click
- Drag
Click
Clicking simply means that you point to an object with the mouse pointer![]() , then press and release the left mouse button.
, then press and release the left mouse button.
Double-click
Double-clicking means that you point to the object with the mouse pointer then press and release the left mouse button two times in rapid succession without moving the mouse between clicks.
Right-click
Right-clicking means that you point to an object with the mouse pointer![]() then press and release the right-hand mouse button.
then press and release the right-hand mouse button.
If the object has a pop-up menu attached, it is displayed. Pop-up menus are also called context menus.
Drag
To drag an object:
- Point to it with the mouse pointer.
- Press and hold the left mouse button.
- Move the mouse to drag the object to the new position.
- Release the mouse button.

This book uses the words choose and select. These can be substituted for the word click.
Using the Keyboard #
The underlined letters on the menu bar and in the menus are called access keys. Press Alt then an access key instead of using the mouse.
For example:
To exit the work area using the keyboard, press Alt+F to select the File menu, then press X to Exit.
Once a menu is selected, you can also use the arrow keys to move around the menus and commands. Press Enter to choose the highlighted command.

Some menu commands have a keyboard shortcut listed at the right of the command. You can use these commands without displaying the menu.
Command Variations #
Menu commands with special behaviours look different to ordinary menu commands. The variations are:
- Command with arrow
- Command with ellipsis (…)
- Checked command
- Dimmed command.
Command with Arrow
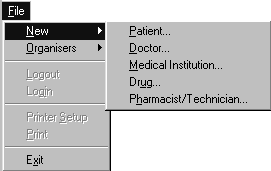
When you select a command that is followed by an arrow, a submenu with another level of commands is displayed.
For example:
When you select New from the File menu, a list of additional commands appear.
Command with Ellipsis (…)
When you choose a command that is followed by an ellipsis (…), an additional screen is displayed for you to enter the extra information needed to run the command.
After you enter the information, choose OK. You can also choose Cancel to close the screen without carrying out the action, or Help to get more information.
Checked Command
When a command displays a check mark to its left, it is already in effect. Choosing the command again turns it off.
Dimmed Command
When a command appears dimmed, it does not apply to your current situation and is unavailable.
For example:
Paste on the Edit menu appears dimmed if you have not first used either Copy or Cut.
Toolbars #
Toolbars have buttons that perform many of the routine tasks that you can do using the menu commands.
To see what a toolbar button does, point to the button with your mouse cursor. A description of the button appears in the status bar.
Using Toolbars #
To perform an action using a toolbar button, simply point and click on it. There are no keyboard methods for using toolbars, they are only accessible with the mouse. However, all toolbar actions have menu command equivalents, and keyboard shortcuts are provided where appropriate.
Some menu commands have a keyboard shortcut listed at the right of the command. You can use these commands without displaying the menu.
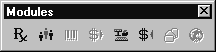
Moving Toolbars #
You can pull the toolbars off the top bar and reposition them anywhere on the work area. To do this, drag the double bar at the left of the toolbar to the new location.
![]()
When the toolbar is on the work area, move it by dragging its title bar. You can even move the toolbar completely off the work area.
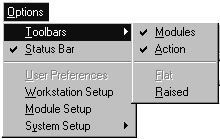
Displaying Toolbars #
You can choose which toolbars are displayed.
- From the Options menu select Toolbars, then choose the toolbars that you want to display.
If a toolbar is displayed, it will have a check mark next to it.
To hide a toolbar, choose it again to remove the check mark.
Status Bar #
The status bar (see picture page 23) shows the current date and other explanatory information. Displaying the status bar is optional.
- To turn the status bar on or off, choose Status Bar from the Options menu.
If the status bar is displayed, the menu command will have a check mark next to it.
Splitter Bar #
Use the splitter bar to resize various parts of the work area.
- Position the mouse cursor over the splitter bar.
The mouse cursor changes to
- Click and drag the splitter bar to the required position.
There is no keyboard equivalent for this action.


