If your Pharmacy uses ‘Add / Edit Specials’ application (Tools Utilities Stock Utilities Add / Edit Specials)
- When you enter into the ‘Sales’ module for the first time, if you have Auto Specials that are due to be activated / deactivated then a prompt will occur (as shown in Figure 1.2.1).
- You will be given three options. These are:
 Select this button when you want to print shelf labels for new special prices. The labels you produce will have to replace the current shelf labels in the store to reflect the new special price. After you have selected to print your shelf labels, select ‘Change and Continue’ to enter into the LOTS Point of Sale screen.
 Select this button if you want to view a listing of all specials that are currently due to become activated today or are currently active. These specials will be displayed on the screen in ‘red’ because they are ‘Active Specials’. You can modify the specials at this point by selecting ‘File’ ‘Edit Special’ or simply by pressing the [Ctrl] + [E] keys. You will then be prompted to enter in the name, PLU, or barcode of the item that you wish to edit. You can edit any of the fields in this line including the end date whereby you can extend the finish date if the item isn’t selling. Select the ‘OK’ button once you have viewed these will bring you back to the Auto Specials prompt (as shown above in figure 1.2.1). Press ‘Change and Continue’ to enter into the LOTS Point of Sale screen.
 Select this button when you want to proceed into the ‘LOTS Point of Sales’ screen. This applies the changes to the POS; therefore the item will be scanned at the special price.
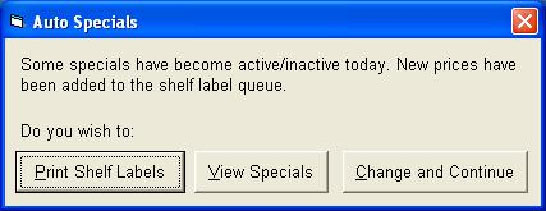
Figure 1.2.1


