- Navigate to Storage Locations via LOTS Start Menu Tools Utilities Stock Utilities Storage Locations.
- This will bring up the ‘Storage Location’ window (see Figure 6.1.1).
- You can have up to four location levels.
- To add a location select ‘Add Location’ this will create a new location at the top level and allow you to type in a name (see Figure 6.1.2).
- You will also need to add in a code for the location. The ‘Full Code’ field is automatically generated. The Full Code field lists the codes of each level separated by a dash (see Figure 6.1.3).
- To add a sub location, highlight the level you want the sub-location to appear under, then select ‘Add Sub Location’.
- Once you have set up your locations you can add stock. Select the location of where you want the stock card to be associated to, and then select ‘Add Stock’.
- Selecting ‘Add Stock’ will open up the ‘Stock Multi Search’ window (see Figure 6.1.4).
- Use the filters to help select the product you are after. Once added they will show up under the location (see Figure 6.1.5).
Note: Ensure that ‘Show Stock Items’ is ticked. - To print a list of the locations select ‘Print’.
- If you want to print a list of the locations and the stock associated with them, select ‘Print Stock Listing’.
- Selecting Print Stock Listing will ask you to chose the level of detail (see Figure 6.1.6):
- No Breakdown – This will show each product and its SOH, Max Qty, Facing and Unique Code.
- By Sub Location – This will show each product and its SOH, Max Qty, Facing and Unique Code by sub location.
- You can also set up the code of the item in Stock Cards.
- Navigate to Stock Cards via LOTS Start Menu Stock Cards
- When in Stock Cards bring up the product and go to the ‘2 Stock Flags’ tab.
- In the Location section of the tab click on the plus symbol (+),
- Clicking on the plus symbol will bring up the ‘Location Search’ window, and will prompt you to enter in the location of where you want the product allocated to (see Figure 6.1.7).
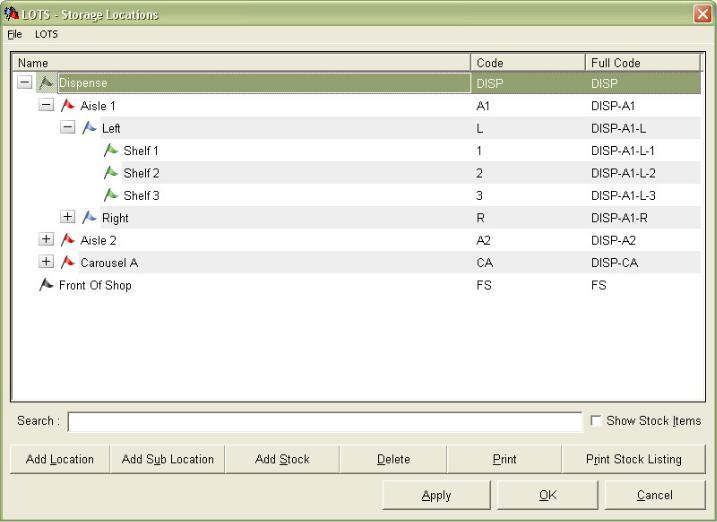
Figure 6.1.1
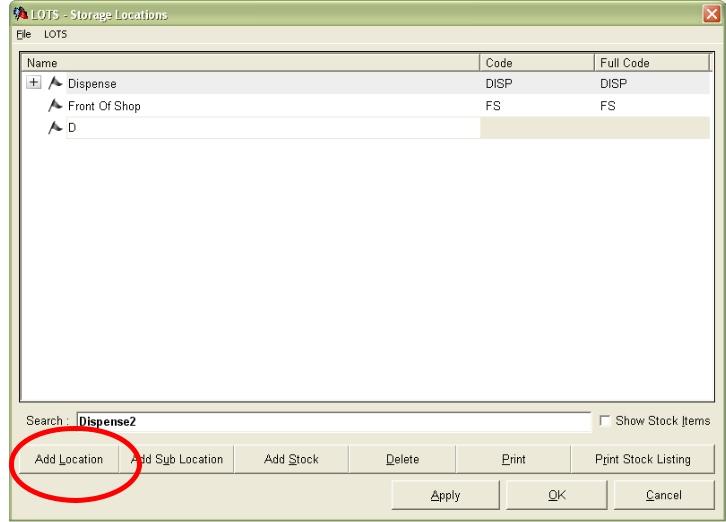
Figure 6.1.2
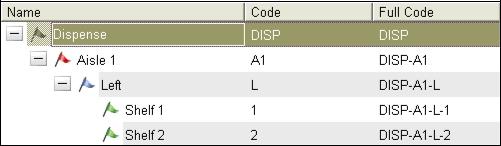
Figure 6.1.3
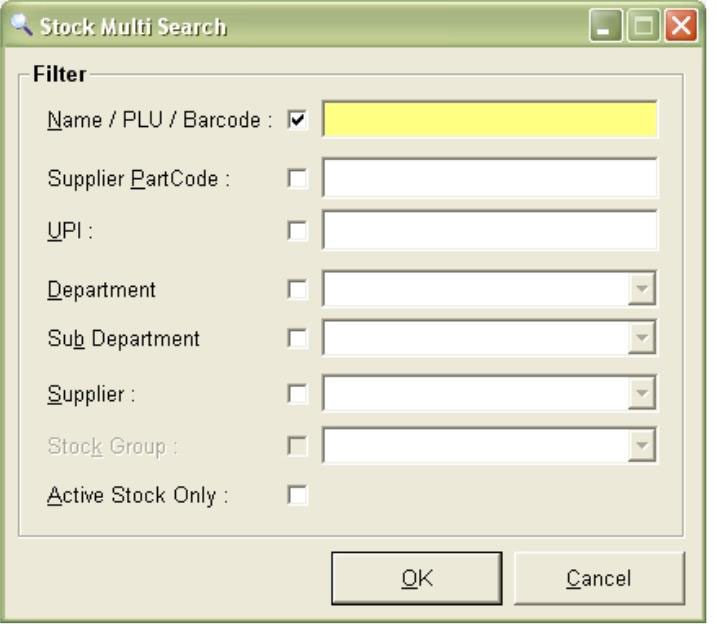
Figure 6.1.4
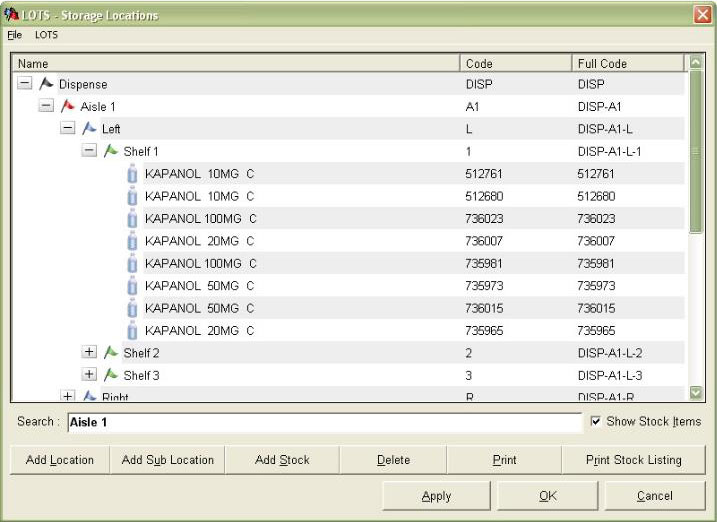
Figure 6.1.5
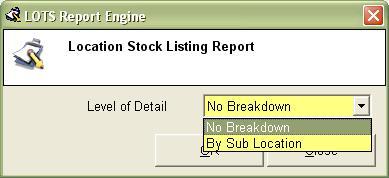
Figure 6.1.6
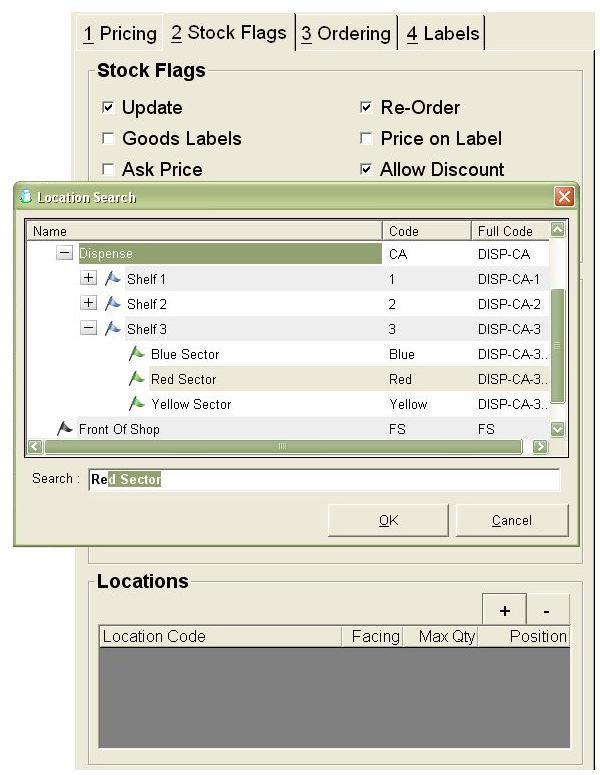
Figure 6.1.7
Note: If you wish you can add multiple locations to the one stock card.
Note: You can remove a location by highlighting the location and selecting the minus symbol (-).


