- By entering in your Staff ID in LOTS POS or Dispense, the Diary application will automatically start up in the taskbar (as shown in Figure 8.2.1).
- If there are no Diary Alerts for a staff member the diary application will be minimised in the task bar and remain there until you exit LOTS. To use the diary application, simply click on it in the task bar.
- If there is a Diary Alert for a staff member the diary function will open up in front of the LOTS screen as soon as the staff member enters in their Staff ID (as shown in Figure 8.2.2).
- The Diary application can also be accessed from the LOTS Main Menu via: Tools Utilities Staff Utilities Diary.
- Select the ‘Diary’ application from either of the two ways listed above.
- This will bring up the ‘Messages’ window (as shown in Figure 8.2.2).
- Enter your Staff ID.
- Selecting ‘New’ will bring up the ‘New Message’ window (as shown in Figure 8.2.3).
- In the ‘Send To’ window select the staff member you want to assign the message to.
Note: You can assign a diary message to yourself. You can also assign a diary message to everyone (including yourself) by selecting ‘All Staff’.> - Then in the ‘Message’ field type in the message.
- Select when you would like the message to be displayed. There are three types (as shown in Figure 8.2.4):
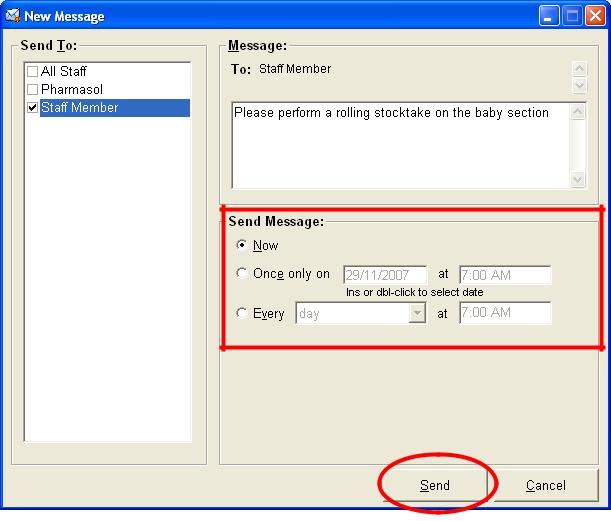
Figure 8.2.4
- Now – this will appear the next time the staff member logs on (enters their Staff ID).
- Once only on – This option allows you set the date and time of when you want the message to appear. If the staff member is not working at that time the message will appear the next time they enter their Staff ID.
- Every – This option allows you to set a recurrence type (day, week,month, first day of month or last day of month) and a time. Once again if the staff member is not working at that time the message will appear the next time they enter their Staff ID.
- Once complete click on the ‘Send’ button
- The message (assuming ‘Send Message’ was set to ‘Now’) will appear on the PC that the staff member is logged on to (as shown in Figure 8.2.5).
- Staff members can at anytime view all the messages they have been sent in the ‘My Messages (0) new’ tab.
- To reply to the message, simply click on ‘Reply’ button and this will open the ‘new message’ window with the recipient (the person who sent you the message) already ticked.
Note: While the recipient is already ticked you can also add more staff members to your reply. - Any unread messages will be shown in your ‘My Messages (#) new’ tab with an orange star on top of a closed envelope icon, while a read message will be displayed with an open envelope icon (as shown in Figure 8.2.6).
- If you wish to delete a message after you have read it simply highlight the message and click on the ‘Delete’ button. This will remove the message from your ‘My Messages’ tab.
- You can view all your messages, including the ones you have deleted by ticking the ‘Show All messages’ tick box (as shown in Figure 8.2.5 – previous page). The deleted messages will be shown as an unopened envelope with a red ‘X’ on it (as shown in Figure 8.2.7).
- If you have created a message you want to assign to a staff member at a later date, these message(s) will be saved in your ‘My Pending Messages (#)’ tab (as shown in Figure 8.2.8).
- To print any messages; simply highlight the message (in either tab) and click ‘Print’.

Figure 8.2.1
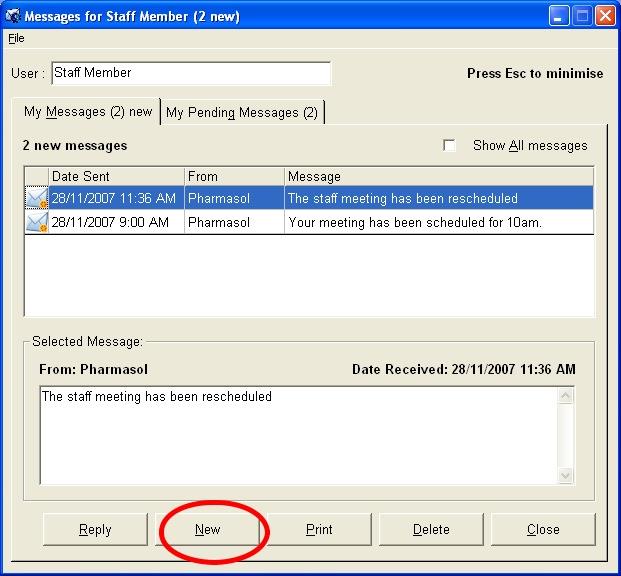
Figure 8.2.2

Figure 8.2.3
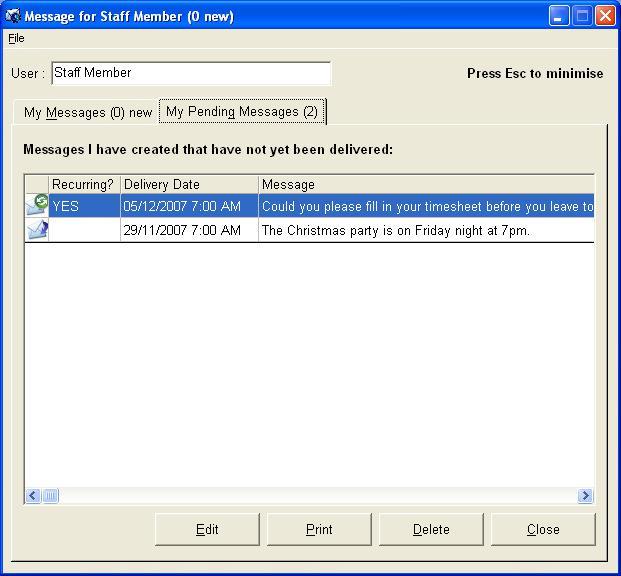
Figure 8.2.5
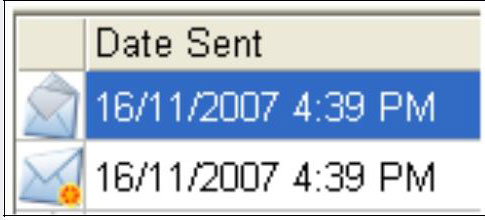
Figure 8.2.6
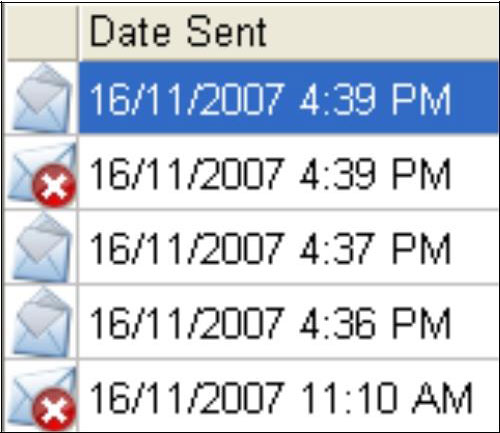
Figure 8.2.7

Figure 8.2.8
Note: All diary messages are printed to the report printer.In addition, for security purposes, if LOTS is unused for more than 20 minutes, the ‘My Messages’ screen is blanked out and the staff member will have to re-enter their Staff ID to activate this screen again.


