
The Tagged Customers option enables you to add, rename or delete the customers to Tagged Group.
There are two ways of adding the Customers to the Tagged Groups:
Using Edit Options: You can create the Tagged Group first and then add the Customers to the Tagged Groups.
Using Right-Click: You can directly add the selected customers to the existing Tagged Group or new Tagged Group.
To add or edit tagged customers:
1. In the RPM menu, click Customers and then click All Customers.
The All Customers screen is displayed.
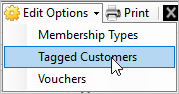
2. Select Edit Options and then select Tagged Customers.
The Edit dialogue is displayed.
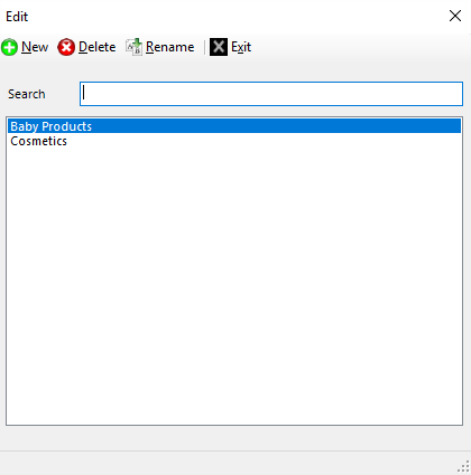
3. Do one of the following:
To add new Tagged Customer, select New.
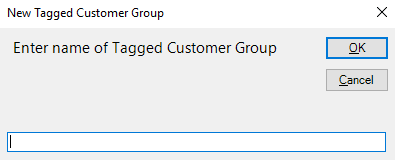
The New Tagged Customer Group dialogue is displayed.
To rename the existing Tagged Customer, select Rename.
The Rename Tagged Customer Group dialogue is displayed.

4. Enter the name of the tagged customer group.
5. Select OK to save the changes.
The name of new tagged customer group is created.
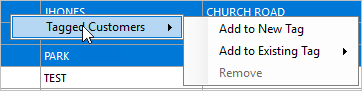
6. Select the customer(s) you wish to add to the newly created Tagged Customer Group.
7. Right-click on the Customer row, select Tagged Customers and then select Add to Existing.
NOTE
If you wish to add the selected customer(s) to a new Tagged Customer Group, then select Add New.
8. From the list, select the Tagged Customer Group that was created above.
The Customers will be added to the Tagged Customer Group.