
This section outlines common activities needed to complete common tasks in Corum Clear Dispense. We assume that you are familiar with using Windows® and the basic concepts of dispensing. Here we cover information related with keyboard shortcuts, navigation menus, controls and field behaviours; to improve your experience of using the product.
Entering Information
Information is automatically updated in the fields depending on your selection criteria or the barcode that you have scanned; you can update or modify specific fields by directly typing in what you need.
Information can be entered in any order, while top-down is the normal approach, if you do decide to, you can select or change the patient name at the very end, after all other details have been entered. When this happens, existing details that you typed in will not be lost with the newly selected or entered details; if there is an information mismatch or the data entered is incompatible, you will see related notifications depending on the change needed.
CCD also gives you the option of changing a patients name much later in the dispensing flow, such as after dispensing several scripts.<
Most controls are normally enabled to support data entry in any order. However, the entire Dispense panel except for the Patient search box and the Cancel button are disabled if the selected patient is deactivated.
There are some scenarios in which additional fields are displayed, such as for outside repeats or when alternatives are offered as in the case of blanks and extemps, these scenarios are covered in more detail in their respective topics.
Text Fields and Navigation
The field in focus is indicated by a light blue border, buttons in focus have a blue background and a dotted focus rectangle. If CCD is integrated with LOTS POS, the focus field that you are currently entering information in is indicated by a yellow text field with a blue border.
When you need to input data in a text field, all existing content is automatically selected so that when you begin typing, the text is replaced. All text in the focus field is highlighted when you click on a field or use the Tab key to navigate from field to field. For more information see Getting Started or Standard Navigation.
The main command button in each screen will have a blue background. It is effectively the default button which will change depending on the context and the details entered. The other buttons appear in grey, as shown.
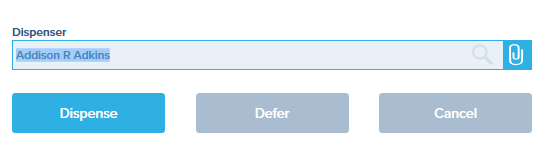
Disabled buttons are indicated in a lighter grey colour and they cannot be used.

Main Tab Fields
The main tab fields are the most frequently used fields. They help you complete typical tasks as quickly as possible, using the smallest number of keystrokes. Main tab fields may change dynamically according to information entered.
For example
The Authority # is not typically a main tab stop although it is always enabled. However, if an authority required drug is selected for dispensing, it becomes a main tab field.
Pressing Tab or Shift + Tab will move the cursor from field to field. Whereas, pressing Enter will take the cursor to the next main tab field on the Dispense screen. Alternatively, you can also use the Up and Down arrow keys on your key board to move between the main tab stops on screens.
Notifications
Field-specific informational notifications will be displayed in blue above the affected field.

Some errors will be indicated inline in red text font on captions of affected fields. In a few cases a brief explanation of the error condition will also be displayed.

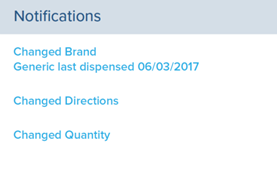
General informational notifications will be displayed in blue in the Notifications panel.
Keyboard Use
The dispensing workflow is heavily keyboard oriented; all normal work can be accomplished efficiently using just the keyboard.
When you type in information, your keystrokes operate in both the search text box or on the panels depending on where you are, without any need to change focus from one to the other.
For more information on using a keyboard to navigate CCD see, Standard Navigation and Using Keyboard Shortcuts.
Mouse Use
Even though the Dispensing workflow is keyboard oriented, full mouse support is available so you can just as easily use the mouse to perform your daily tasks.
When you click on the magnifying glass icon in the search text box, it will look for information initially in the current search control’s contents. Choosing an item from the search results selects that row and closes the search drop down. Clicking outside the search box and its results area (i.e. on the dim part of the screen) cancels the search.
For information about navigation keys in search, refer to using Esc and using Alt+Down in the The dispensing workflow is heavily keyboard oriented; all normal work can be accomplished efficiently using just the keyboard. section.
Searching
Searching is an integral function of CCD that has been built into the standard text entry workflow. Text entry fields that act as lookup fields are identified by the magnifying lens icon. Search results are displayed in drop down lists that are automatically filtered based on the information that you enter into the field.
To read information about searching in CCD click Searching
TIP
To access all available shortcuts on the Dispense screen, refer to Using Keyboard Shortcuts.