
Use the Script Organiser to:
- Browse scripts for all patients dispensed over a date range.
- Perform script actions such as editing, cancelling, changing patient, reserialising, reprinting, etc. These can also be performed on the Dispensing screen.
- Print script‑oriented reports. These can also be printed from the Dispensing screen.
- Archive dispensing history.
- Edit patient details.
- Filter available repeats history.
Opening the Script Organiser
To open the Script Organiser do one of the following:
- From the menu bar, choose Script → Script Organiser.
- Press Ctrl+F2.
If you open the Script Organiser when a patient has been entered in the Patient field of the Dispense screen, the Script Organiser automatically shows all the scripts related to that patient.
The Script Organiser consists of two panes, the Script Organiser pane that shows the record list and the Script Details pane that shows detailed information of individual scripts.
The information shown in the Script Details pane changes according to the script that you have selected in the Script Organiser. The currently selected record is highlighted in blue in the Script Organiser.
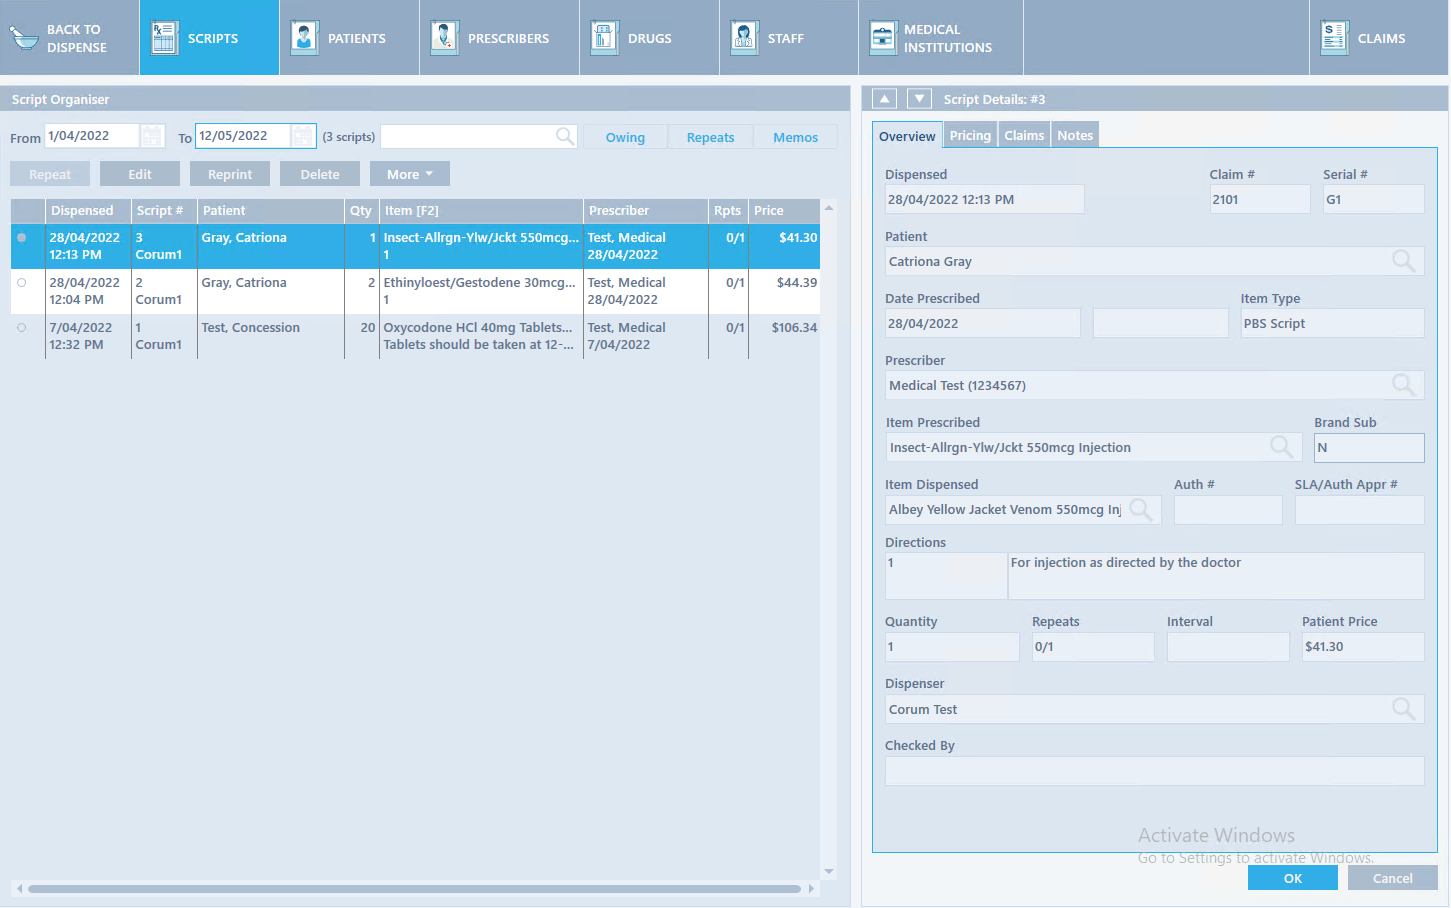
When it is first opened, the Script Organiser shows the most recent scripts in reverse chronological order, which means the most recently dispensed script is at the top.
To change the range of scripts shown, type values into the From and To boxes.
TIP
The Script count for the selected date range is displayed to the right of the To date box.
NOTE
If you choose a large date range (e.g. weeks or months), it takes some time for the Script Organiser to the updated. To use dates several months in the past, it is recommended to select the To date first.
To change the order in which scripts are displayed, click on a column heading with the mouse.
Successively clicking on the same column heading switches between ascending and descending order.
Repeats and Supply Numbers
The Rpts column shows the number of repeats prescribed and the number of the particular supply, separated by a slash (/).
For example,
The original supply for an item with 5 repeats prescribed would be shown as 5/1. The first repeat would be shown as 5/2, the second repeat would be shown as 5/3, and so on.
Deferred scripts have a zero (0) for the supply number (e.g. 1/0), and are also shown in pale text.
Regulation 24 supplies have the letter R in place of the supply number (e.g. 5/R).
More Actions
The More button displays a list of commands for working with scripts. They are available from the Script Organiser and above patient history in the Dispensing screen.
The Script Organiser is commonly used when you want to work on scripts in a date range. While the Dispensing screen is commonly used when you want to work on a script for one patient.
To use the More commands:
1. Select a script.
2. Then do one of the following:
a. Click the More button.
b. Right‑click on a script in the record list.
c. Press F2 while in the record list.
3. Choose the action that you want to carry out.
You can work with one script at a time, or you can queue several scripts at once to be worked on in succession.
Actions Button Commands
The following More actions are available for reach record in the Script Organiser:
| Menu Action | Description |
|---|---|
| Repeat | Dispenses a repeat for the selected script. |
| Edit | Edits the selected script. |
| Change Patient | Changes the patient that owns a script or group of scripts. For further details, see Patient. |
| Copy to New Script |
Copy the information on to a new script. When you select this option, the Dispense screen is displayed with all the information from the selected script automatically entered in the fields. Dispense the script as you would an original script. You can also make changes to the script from the dispense screen prior to dispensing, if needed. For more information about dispensing, click Dispensing Original Scripts. |
| Delete | Flags the selected script as deleted, but retains it in the computer records for auditing purposes. |
| Undelete | This restores a cancelled script. |
| Mark Off Owing | Only available for owing scripts. Opens the script for marking off. |
| Resend (PBS Online) | Resends the selected script to Medicare Australia using PBS Online. This is only available if you are using PBS Online. |
| Reserialise | Assigns a new serial number to the selected script, and puts it in the current claim. |
| Reprint | Reprints labels, receipts, and other documents for selected script. For details, see The Print Screen. |
| Check Barcode | Opens the Script Check process to let you rescan the product barcode. |
| Reissue Electronic Token | Reissues the electronic token associated with the script. |
NOTE
Most of the actions in the More menu will switch you back to the Dispensing screen before commencing, so that you see details and work with them using a similar interface.
TIP
Right click on the Patient History section on the Dispense screen to access the More menu options.
Buttons
The table below lists the buttons in the Script Organiser and describes their use.
Selecting Multiple Scripts
You can select more than one script in the Script Organiser, for instance to dispense several repeats in succession, or to reserialise several scripts at one time.
To select a single script, do one of the following:
- Click on the script in the record list.
- Press F2 from anywhere in the Script Organiser to move to the record list, then use Up Arrow and DownArrow to highlight the script.
To select multiple adjacent scripts:
- Select the first script you require.
- Press and hold Shift, then either click on the last script you require or use Up Arrow and DownArrow to extend the selection to the last script required.
- Release Shift.
To select multiple separate scripts:
- Press and hold Ctrl, then either:
- Click on each script you require.
Use Up Arrow and DownArrow to move through the scripts, and Spacebar to select each script required.
Each time you click or use the Spacebar, it switches the script between being selected and not being selected.
- Release Ctrl when all required scripts are selected.
TIP
You can use both the Shift and Ctrl methods in combination. Use the Shift method to first select the largest continous block, then the Ctrl method to select any extras.