
If the patient has a carer or agent who has authority to provide ASL consent, you can register them instead.
To register an agent or carer for ASL authorisation,
1. Select the ASL button from the Patient Details or Patient Summary panels.
The ASL Patient Registration screen is displayed. The screen is automatically filled with the patient’s details that are saved in your system. These fields cannot be edited.
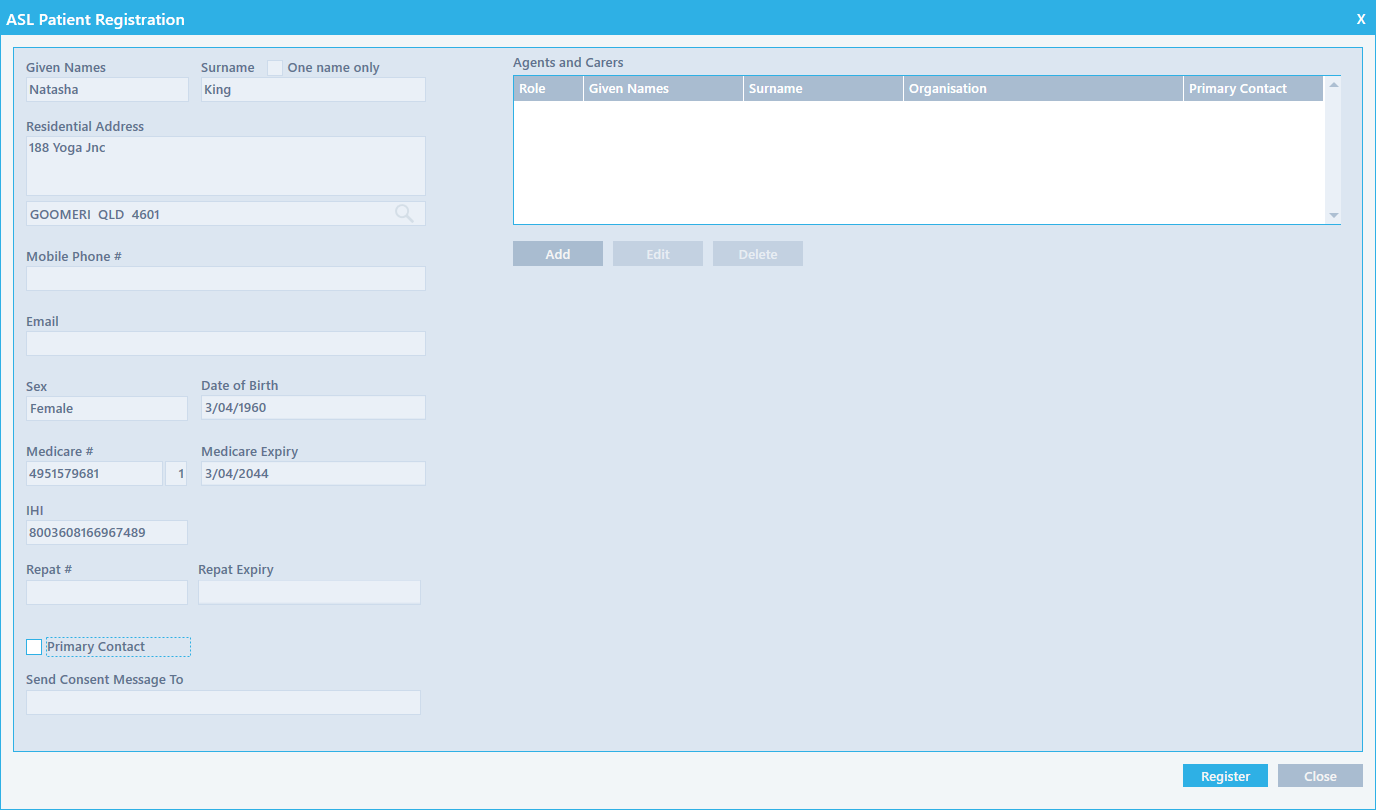
2. Select Add, below the Agents and Carers table.
When you choose this option, additional fields are displayed below the table to enter agent or carer information. The Role field is highlighted by default.
3. Use the Role drop-down to specify the relationship between the patient and the individual.
4. If you selected the Agent option, enter the Given Names, Surname and Address details of the agent.
5. If you selected the Carer option, additional fields will be displayed. Specify the following information for a carer:
- Organisation and Organisation Name – If the patient’s carer is an organisation, tick the checkbox and enter the name of the organisation.
- Mobile Phone # – Enter the carer’s mobile phone number. If the carer is the patient’s primary contact, and the preferred contact method is mobile, the ASL consent message is sent to this number.
- Email – Enter the carer’s email address here. If the carer is the patient’s primary contact, and the preferred contact method is email, the ASL consent message is sent to this email address.
- Primary Contact – Tick this checkbox if the carer is the primary contact for the patient.
- Send Consent Message To – Choose the method by which the carer wants to receive the ASL consent message.
6. Select Save to save the agent or carer details. The Agents and Carers table is updated with the information that you entered.
7. Choose Register to register the patient with the ASL service and trigger the ASL consent process and the ASL button will change colour to amber.